How to Create Complex Shapes With Adobe Illustrator Pathfinder Effects
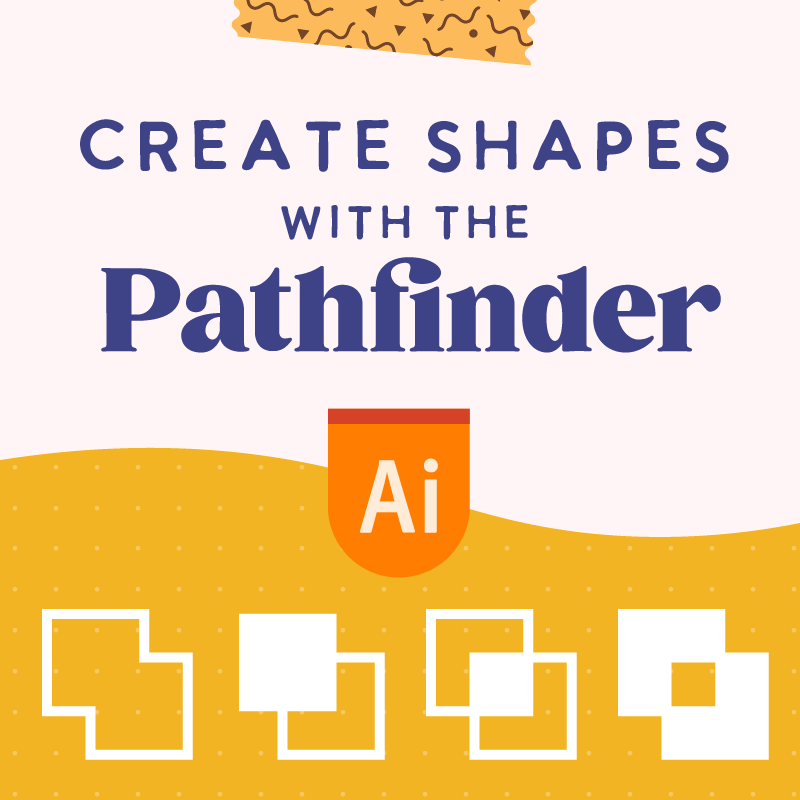
This post walks you through the basics of Adobe Illustrator Pathfinder Effects so that you can build complex vector shapes with the basics ones.
Previously, we have covered How to create simple shapes and visually create new shapes using the handy dandy Shape Builder tool. We will kick it up a notch and create custom shapes using primarily the Pathfinder Effects.
This tutorial is primarily drawn from my Skillshare class, Illustrator Nuggets for Surface Designers. You can grab a free seat using this link.
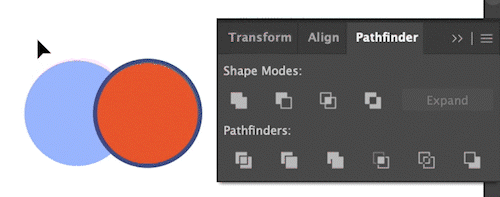
What is Pathfinder Panel?
Simply put, the Pathfinder panel helps you to make new shapes out of multiple shapes.

Pathfinder Panel
How to Navigate to the Pathfinder Panel
Window > Pathfinder
Tip: The list of panels under the Window menu is alphabetically ordered.

windows>pathfinder
Options in Pathfinder Panel
There are two rows of options that live in the Pathfinder Panel. We will go over the options one by one. The options from the first row are shape modes. And the options in the second row are pathfinder effects. I find it unhelpful to spend efforts distinguishing the two. Our time will be best spent on associating the icons with visual results. So that's what we will do next.
Select two or more objects to which you want to apply the effect. They can be individual or group(s) of shapes and objects.
Unite (or Add)

Unite option in the pathfinder panel
This option joins all the selected objects together. If the objects have different fill colors and other graphic attributes, the final shape takes on the visual style of the frontmost object.

Unite in action
Minus Front

Minus Front option in the pathfinder panel
This option works like a cookie-cutter. With both shapes selected, click "Minus Front," The bottom shape should now have a cutout of the top shape.
Sometimes the situation is a bit more complex than the example above. When more than two objects are selected, all the shapes/objects above the bottom shape serve as the "cookie cutters."

minus front with multiple objects
Intersect

intersect option in Pathfinder Panel
The Intersect option is pretty straightforward because it produces the intersect shape areas between twoshapes. In other words, you will have the overlapped area as a result. And it will take on the graphic style (color, fill, gradient, etc.) of the top object.
intersect in action
Exclude

exclude option in Pathfinder Panel
You can consider this option the opposite of the Intersect because it combines all the shapes except the overlapped areas. And it works with two or more objects.

exclude in action
Divide

divide option in Pathfinder Panel
The option looks at the overlapping objects and divides them into the most sub-areas based on the selected shapes. Unlike previous options, where you see the visual result immediately, this divide option doesn't show any visible difference initially. To make it even more confusing, it also groups all the sub-areas into one group, so if you were to move them around using the selection tool (V), they all travel together. To separate the group, you will need to Ungroup the selected objects (Command + Shift + G on Mac or Ctrl + Shift + G on Windows) or use the Direct Selection Tool (A) to move sub-shapes around.

divide in action
Trim

trim option in Pathfinder Panel
Ok, now we have officially reached a point where words don't make sense anymore. It is when an animated GIF is worth a thousand words. So, excuse the brevity of the paragraph and watch how the Trim option works in action below. (psst, remember to ungroup!)

trim in action
Merge

merge option in Pathfinder Panel
Same as above, I will let the GIF do the heavy-lifting of explaining. By the way, if you'd like a quick download of all the GIFs covered in this post as a handy dandy cheat sheet, here is your link.

merge in action
Crop

crop option in Pathfinder Panel
This is one of my favorite and the most used option on this panel. But read on because I don't use it right out of the box. I have a separate post in the near future that explains all the different ways to crop inside Adobe Illustrator. But long story short, the best practical use case for this option is to trim off the excess anchor points after applying a clipping mask (again, read the post for deets)

Crop in action with a clipping mask applied
Outline

outline option in Pathfinder Panel
This option divides an object into its component line segments or edges. According to Adobe, "this command is useful for preparing artwork that needs a trap for overprinting objects. See Create a trap." Full disclosure, I am not a print designer, and this function is not what I use regularly. If your curiosity leads you, I will refer you to the more detailed tutorial on Trapping by Adobe.
Minus Back

minus back option in Pathfinder Panel
This one functions similarly to the Minus Front option we covered a minute ago, except the top object is the "dough" of the cookie, and any shapes below are the "cutters." Like I said, your time will be best spent when you practice these options visually.

Minus back in action
A Quick Word on Creating a Compound Shape
A compound shape is a temporary shape that is made from selected objects. It is a live shape, which means that you can still move the original objects around without committing to a final result.
You can create a compound shape using any shape modes (first row) from the Pathfinder Panel. Think of all the shape modes that we have covered (Unite, Minus Front, Intersect, and Exclude), except the final result being dynamic/live.
To create a compound shape, you can hold your Option key on Mac (or Alt key on Windows) when clicking on the shape modes. The outlines of the original objects are still visible upon hover, which you can adjust their position by using the Direct Selection Tool (A)
To learn more about compound shapes and compound paths, check out this article.
In the meantime, happy designing!
What's the difference between Pathfinder, Shape Builder, and Reshaper Tool in Adobe Illustrator?
You are in luck, I have made a lesson just for that! This lesson is a portion of my Skillshare class Adobe Illustrator Nuggets For Surface Designers: Level Up Your Art Skills (-> grab this link to get a 30-day free trial)
https://www.youtube.com/watch?v=bedsnZaPVuE

About the Author
Hi, I am an illustrator and digital brush creator who loves exploring all mediums. I've had the joy of collaborating with some wonderful folks, like Cloud9 Fabrics, and MSU Broad Art Museum, and sharing some tidbits of my creative process through UPPERCASE Magazine. My heart finds joy in food and nature illustrations, and I share my creative process on my YouTube Channel and teach well-designed illustration classes on Skillshare.
Portfolio | Instagram | Pinterest | Digital Brushes | 1:1 Coaching Calls

Skip hours of sifting through generalized tutorials, and enjoy a personalized learning session with a laser focus. In a 1-on-1 session, you will receive personalized instruction on how to elevate your digital illustration to the next level based on your own artistic style and preference using Procreate, Adobe Illustrator, and Photoshop, as well as your paper sketchbook.


Premium Digital Brushes for Artists: Created by an Illustrator, for Illustrators. These expertly crafted digital brushes are designed to enhance your artistic workflow, offering precision, versatility, and exceptional quality tailored specifically for digital illustration.


Free Procreate Brushes Free Adobe Illustrator Brushes as well as other helpful resources to get you started in digital Illustration