
All About the Shape Builder Tool in Adobe Illustrator: A Comprehensive Overview
This beginner-friendly post is a comprehensive guide on how to use the Shape Builder Tool in Adobe Illustrator.

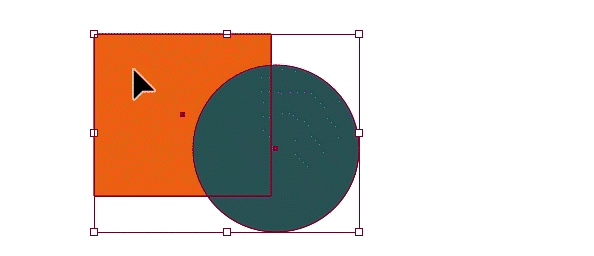
The Shape Builder Tool in action
What is the Shape Builder Tool?
Adobe Illustrator Shape Builder Tool is hands down the most intuitive way to create new shapes out of existing shapes, simple or complex. If you need any refresher on how to create basic shapes in Adobe Illustrator, this post will bring you up to speed on the fundamentals of creating shapes, like how to use the rectangle tool, etc. The Shape Builder Tool can provide immense help when drawing because it offers you a new perspective to see shapes. Instead of drawing a complex shape from scratch, and wrestling with unruly anchor points for more accurate results, you can just simply use the Shape Builder Tool to create new shapes out of existing ones. It saves a lot of frustrations a beginner (or seasoned artist, really) may face getting into a vector illustration. And visually, it delightfully prevents adding a bunch of unnecessary additional anchor points. It's a game-changer for sure. Shape Builder Tool is located in the Tools Panel, and the keyboard shortcut is SHIFT + M.
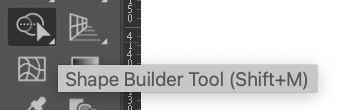
illustrator shape builder in the tool panel
Use Case 1: Joining or Merging Multiple Shapes
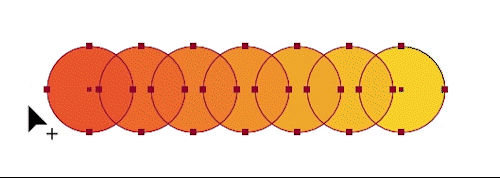
By default, the Shape Builder Tool is in merge mode, where you can lump all the shapes together by click-and-dragging.
Step 1: Select all the overlapping shapes you want to work with using the Selection Tool (V)
Step 2: Activate Shape Builder Tool (Shift + M), Click and drag. You will notice a plus sign appears on the lower right side of the pointer, and each sub-region you hover over gets highlighted with shading. This gives you visual cues to identify the final combined shape."

pointer with plus sign
note: The newly formed shape will inherit the last selected fill color, which may or may not be the color of current shapes.
GIF Using the Shape Builder Tool to merge_1
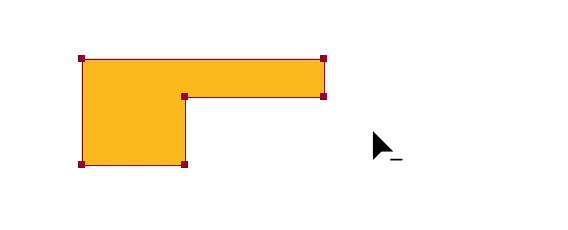
note: the Shape Builder Tool only works with overlapping shapes. In other words, the shapes have to touch other shapes, or at list with aligned edges like the example below. Think legos pieces, they have to touch to build new shapes, right?

Shape Builder Tool combines only overlapping areas_1
Use Case 2: Erasing/Deleting Regions
The process of erasing or deleting regions of multiple shapes is very similar to merging, except it works in erase mode.
Step 1: Select all the overlapping shapes you want to work with using the Selection Tool (V)
Step 2: Activate Shape Builder Tool (Shift + M), Click and drag while holding the Alt key (Windows) or the Option key (Mac OS). A minus sign appears right next to the pointer the hotkey is pressed.
GIF Using the Shape Builder Tool to erase img
It works like a very efficient and accurate eraser or a super-fast pair of scissors. If only we could have this tool in real life when sketching on paper.

GIF Using the Shape Builder Tool to erase
Use Case 3: Extracting a Region
Sometimes what we need is just one sub-set from a complex combination of shapes like this one below. The Shape Builder Tool is great at letting you take what you need. Say that you only want the intersection of the two shapes:
Extracting a region using shape builder tool
Step 1: Select all the overlapping shapes you want to work with using the Selection Tool (V)
Step 2: Activate Shape Builder Tool (Shift + M), simply click the target area. Boom.
If you need multiple sub-regions from the shape, just click away until you have cut them all, then use the Selection Tool to pick them out at the end, or take out the areas you don't need.
◤Tip: As long as the Shape Builder Tool is active, you can do all 3 use cases at the same time. Just have your Alt or Option key handy.
Use Case 4: Working With Paths and Line Segments
By now we have seen how this tool weaves through complex shapes, overlapping sections, multiple objects to create new shapes. But did you know the Shape Builder Tool works with multiple paths, too? Let's take a look. Oftentimes, my work looks like this: a group of objects mixed with paths and shapes. As much as I like perfectly aligned geometric shapes, I also freehand-draw a lot to add personality to my body of work. The Shape Builder Tool is a great option when you need to delete edges of selected shapes. It's pretty much doing a digital haircut for your drawings. Just use the Shape Builder Tool over selected shapes while holding the Alt or Option key to trim the stray paths.

deleting shapes in one go
Here is a fish illustration I did for my Skillshare Class Unflat: Make Vector Textures from Scratch in Illustrator CC. As you can see, there is some clean-up to do. Use the erase mode as we have covered above, and just trim trim trim to your heart's content.

About the Author
Hi, I'm Esther, a multidisciplinary illustrator and digital brush creator exploring all mediums, from paper to pixels. I've collaborated with Cloud9 Fabrics and MSU Broad Art Museum, and teach illustration process through Esther's Art Lab that bridges traditional and digital workflows, from paper to pixel.s

Skip the guesswork and find your digital match. Learn the entire illustration process from paper to pixels. See how Procreate, Photoshop, and Illustrator handle three projects, then choose the one that fits your style.

Skip hours of sifting through generalized tutorials, and enjoy a personalized learning session with a laser focus.


Premium Digital Brushes for Artists: Created by an Illustrator, for Illustrators. These expertly crafted digital brushes are designed to enhance your artistic workflow, offering precision, versatility, and exceptional quality tailored specifically for digital illustration.
