How to Use Page Assist in Procreate to Create a Digital Sketchbook
Creating a digital sketchbook in Procreate is a fantastic way to keep all your creative ideas in one place. With the Page Assist function, organizing your sketches and drawings has never been easier. In this blog post, I’ll walk you through the process of setting up a digital sketchbook using Page Assist, and I'll share some tips to help you get started.
What is Page Assist?
Page Assist is a feature in Procreate that allows you to create multi-page documents. It's similar to Animation Assist but focuses on static pages rather than frames of an animation. This makes it perfect for creating digital sketchbooks, comics, and other multi-page projects.
Setting Up Your Digital Sketchbook
1. Preparing Your Template
If you're a subscriber to my newsletter, you should have received a template for your digital sketchbook. This template is designed to help you get started quickly. For those who don’t have the template, don’t worry! You can still follow along by creating a new Procreate file.
2. Activating Page Assist
To enable Page Assist, tap on the wrench icon in the top left corner of Procreate to open the Actions menu. Then, go to the Canvas section and toggle on the Page Assist option. This feature is mutually exclusive with Animation Assist, so turning one on will disable the other.
3. Understanding the Layers Panel
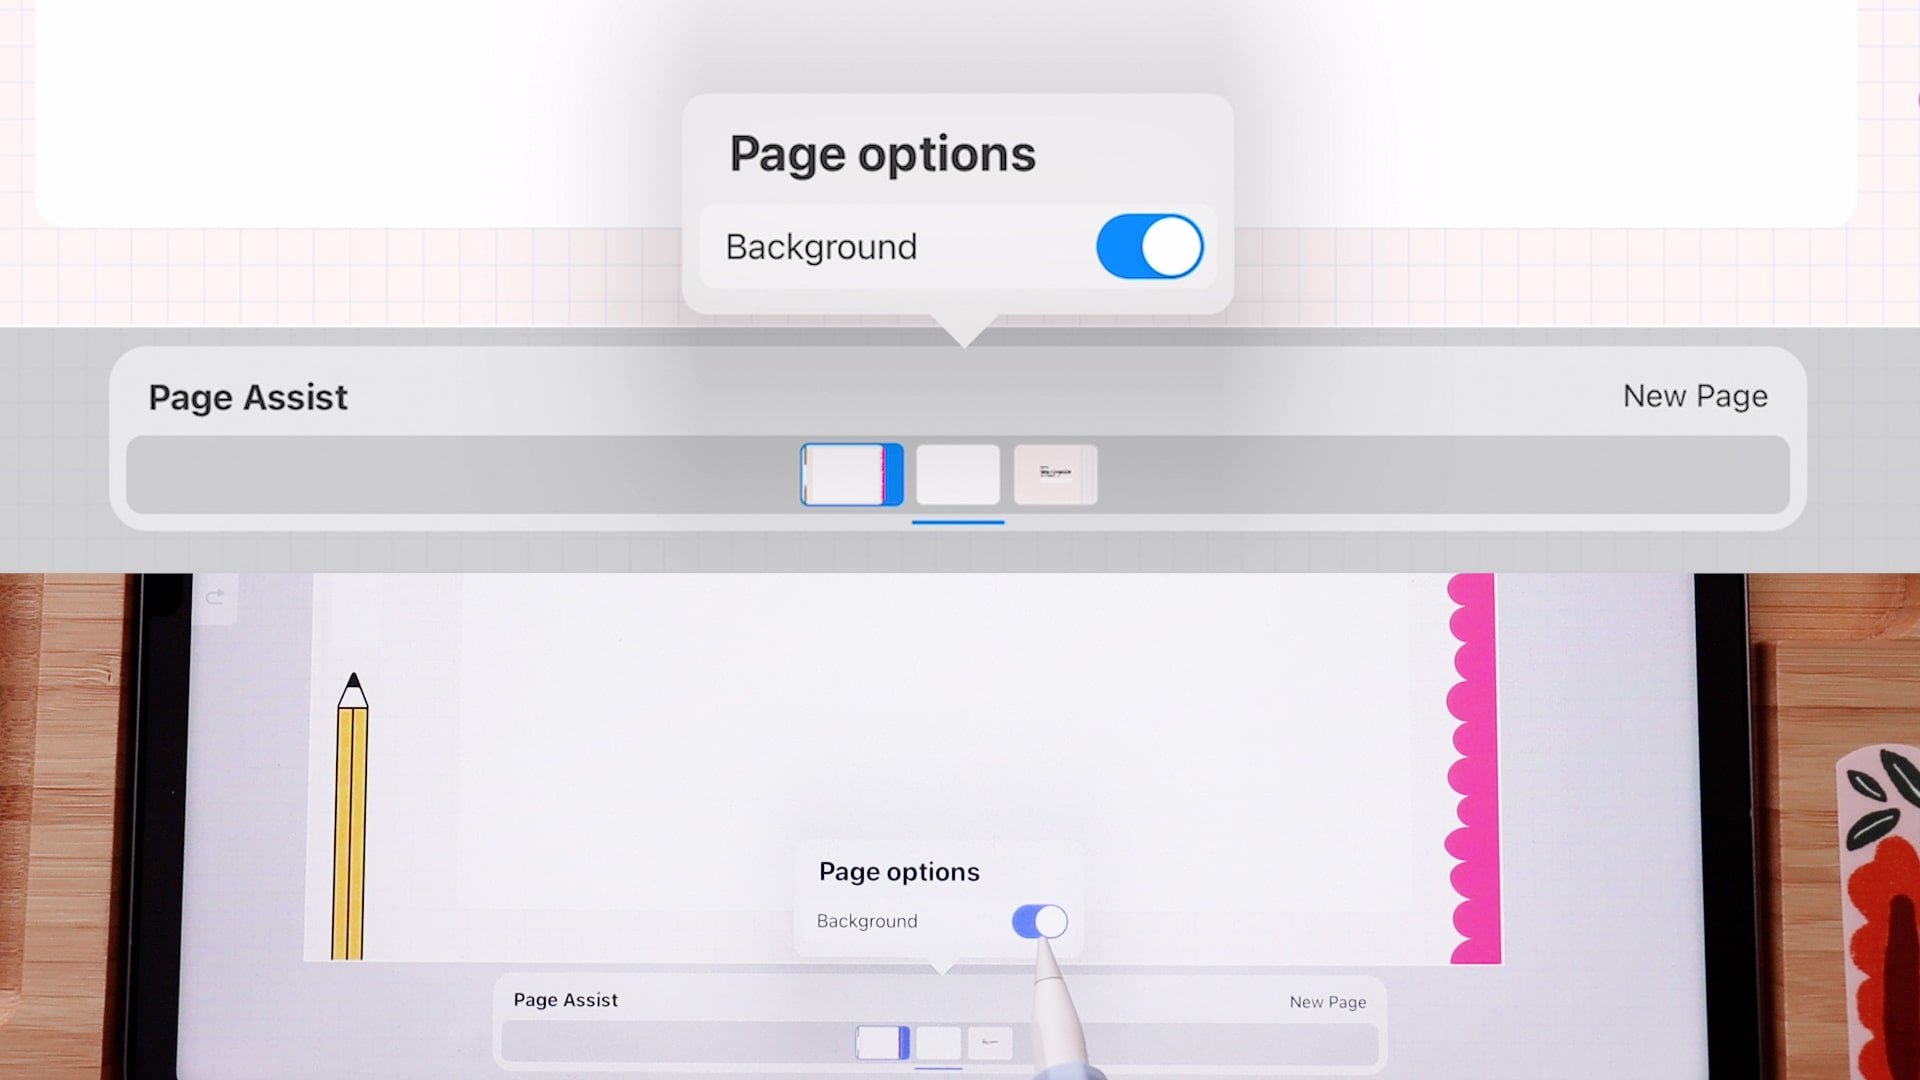
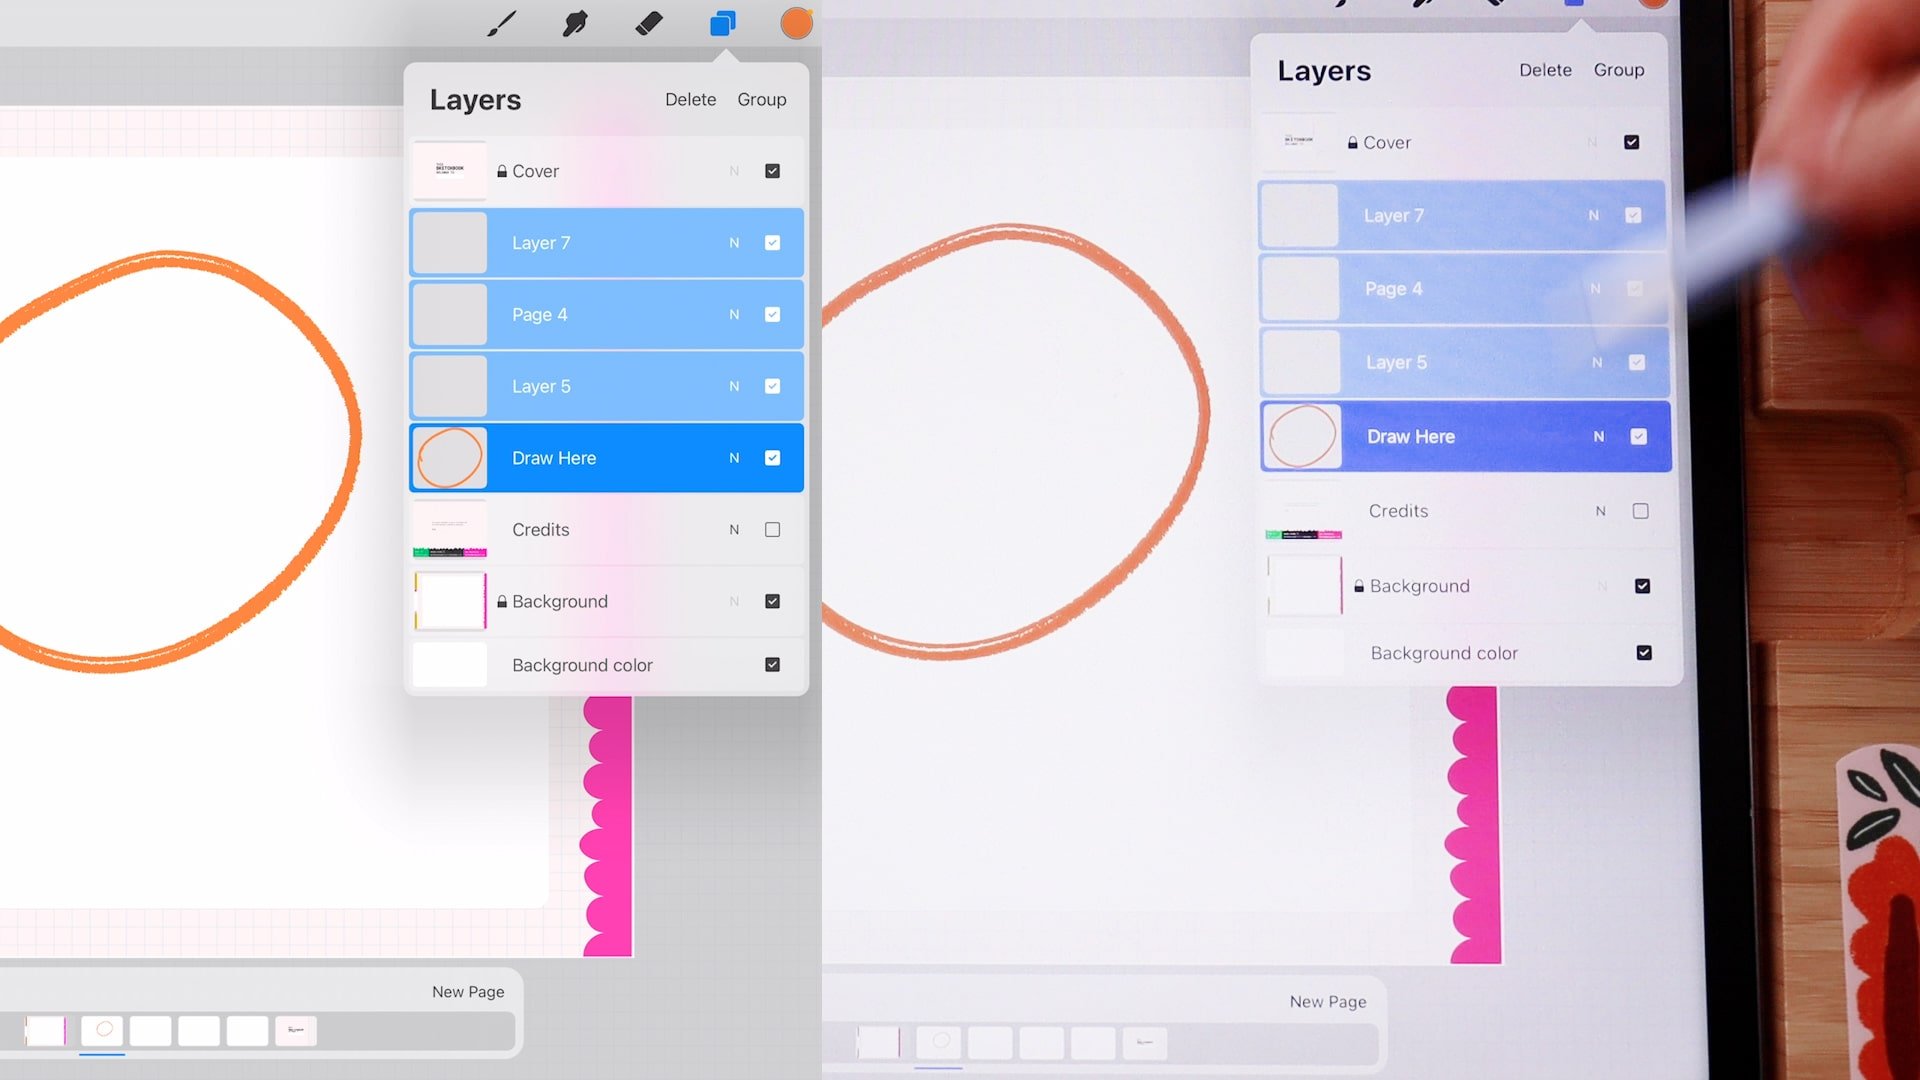
With Page Assist activated, head over to the Layers panel. You’ll notice that the structure is set up to support multiple pages. At the bottom, you'll find a locked background layer. This layer ensures that your sketchbook has a consistent background across all pages, making it easier to focus on your drawings without worrying about accidentally altering the background.
Creating and Managing Pages
1. Adding New Pages
To add a new page, simply tap on the plus sign in the Layers panel or in the Page Assist bar at the bottom of the screen. Each new page will start with a blank canvas, but the background layer will remain visible, reducing the intimidation of a blank page.
How to add a layer/page
2. Drawing on Your Pages
Select a brush and start drawing on the designated layer. You can add multiple layers to each page if needed. For instance, you might have a layer for sketches, another for line art, and another for color.
3. Grouping Layers
If you have multiple layers on a single page, you can group them to keep your Layers panel organized. Swipe right on each layer you want to group, then tap "Group." This helps Procreate recognize all the layers in the group as part of one page.
Exporting Your Work
When you're ready to export your sketchbook, go back to the Actions menu and tap on Share. You can choose to export the entire document or just specific pages. If you only want to export certain layers, long press the visibility toggle to hide other layers, then share the visible content. Long pressing the toggle again will restore the visibility of all layers.
Tips for Using Page Assist
1. Customizing Your Sketchbook Cover
Adding a cover to your digital sketchbook can make it feel more official. Unlock the cover layer, add your name or a title, and then lock it again to prevent accidental changes.
2. Managing Complex Canvases
Procreate allows for up to 83 layers in a document with dimensions of 4000 by 3000 pixels. You can check the layer limit and canvas dimensions by going to the Actions menu, selecting Canvas, and then Canvas Information. This is helpful for planning larger projects.
3. Reducing Blank Page Anxiety
Having a consistent background layer can help reduce the fear of starting with a blank page. It gives you a base to work from and makes the first step less daunting.
Conclusion
Using Page Assist in Procreate is a game-changer for organizing your digital artwork. Whether you're creating a sketchbook, a comic, or a multi-page project, this feature makes it easy to manage and navigate through your work. Download the free template from the link below to get started, and don’t forget to subscribe to my newsletter for more tips and templates.
About Esther Nariyoshi
Hi, I am an illustrator and digital brush creator who loves exploring all mediums. I've had the joy of collaborating with some wonderful folks, like Cloud9 Fabrics, and MSU Broad Art Museum, and sharing some tidbits of my creative process through UPPERCASE Magazine. My heart finds joy in food and nature illustrations, and I share my creative process on my YouTube Channel and teach well-designed illustration classes on Skillshare.
Portfolio | Instagram | Pinterest | Digital Brushes | 1:1 Coaching Calls
Skip hours of sifting through generalized tutorials, and enjoy a personalized learning session with a laser focus. In a 1-on-1 session, you will receive personalized instruction on how to elevate your digital illustration to the next level based on your own artistic style and preference using Procreate, Adobe Illustrator, and Photoshop, as well as your paper sketchbook.
Related Posts
Procreate vs Photoshop 2024: A Comprehensive Comparison for Digital Artists
Essential Guide to Alpha Lock, Layer Masks, and Clipping Masks in Adobe Photoshop
10 Reasons Artists Should Be Excited About the Launch of Procreate Dreams
How to Create and Apply a Displacement Map in Adobe Photoshop
100 Essential Photoshop Shortcuts for Mac Users


