Importing *Layered* Procreate Files into Procreate Dreams for Animation
Where did the layers go in Procreate Dreams after importing the Procreate file? Why does everyone else on the internet have “Convert Layers to Tracks“ except me? In this post, I'll guide you through the process of importing layered Procreate files into Procreate Dreams, a fantastic tool for animators and illustrators alike. Whether you're a seasoned artist or just starting, these steps will help you bring your creations to life in Procreate Dreams.
If you haven’t heard, Procreate Dreams is one of the best pieces of tech that make animation accessible to a wider artist community. As a professional illustrator who also regularly animates, I am loving Procreate Dreams.
Step 1: Prepare Your Procreate File
Layer Organization: Before exporting your file, ensure that your layers in Procreate are well-organized. Label each layer clearly, as this will make the animation process smoother in Procreate Dreams.
Flatten Unnecessary Layers: Plan out your animation, If you have layers that won't be animated (like background elements), flatten them to reduce the file size and complexity.
Step 2: Double-check the settings for Procreate
Many folks aren’t able to convert layers to tracks in Procreate Dreams. In other words, to ensure your Procreate file is Layered after being imported to Procreate Dreams, this step is crucial.
I have a Youtube tutorial that walks you thru the steps, but essentially, you want the Preferred File Format for Procreate in the (iPad general) Settings to be PROCREATE, see the screenshot below
Step 3: Importing into Procreate Dreams
Launch both Procreate and Procreate Dreams side by side
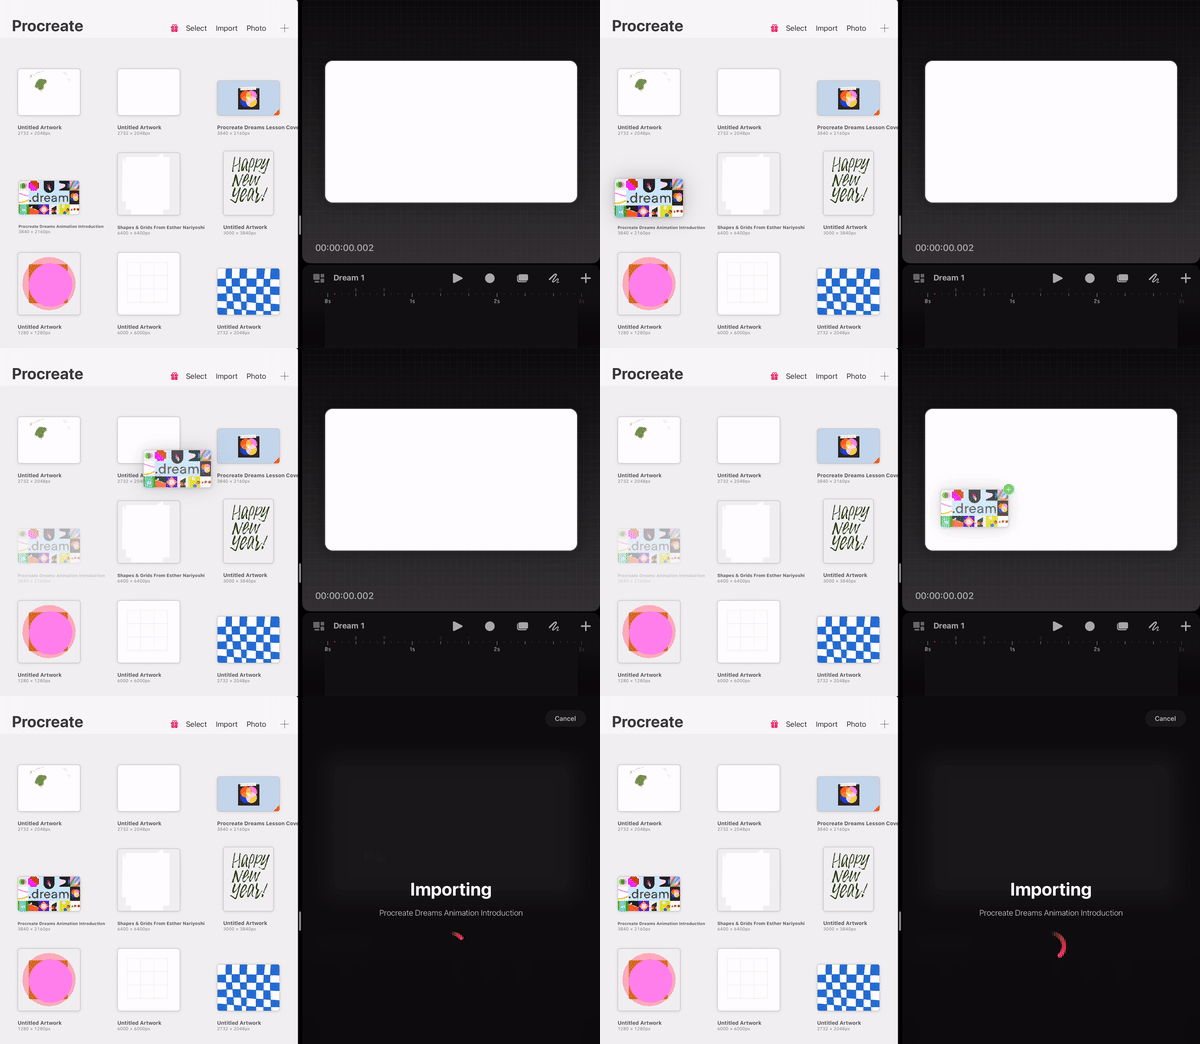
Drag and Drop: Drag Procreate (layered file, from Gallery view like below) and drop it to the Stage or Timeline inside Procreate Dreams
Note: Upon initial import, the track appears be one single layer, keep calm, and read on.
Drag and Drop Import Layered Procreate file to Procreate Dreams
Step 4: Setting Up for Animation
Convert Layers to Tracks: Long press the track (usually automatically named “drawing“) to prompt the context menu. You will find the coveted “Convert Layers to Tracks“ Option and tap on it
Step 5: Convert Layers to Tracks
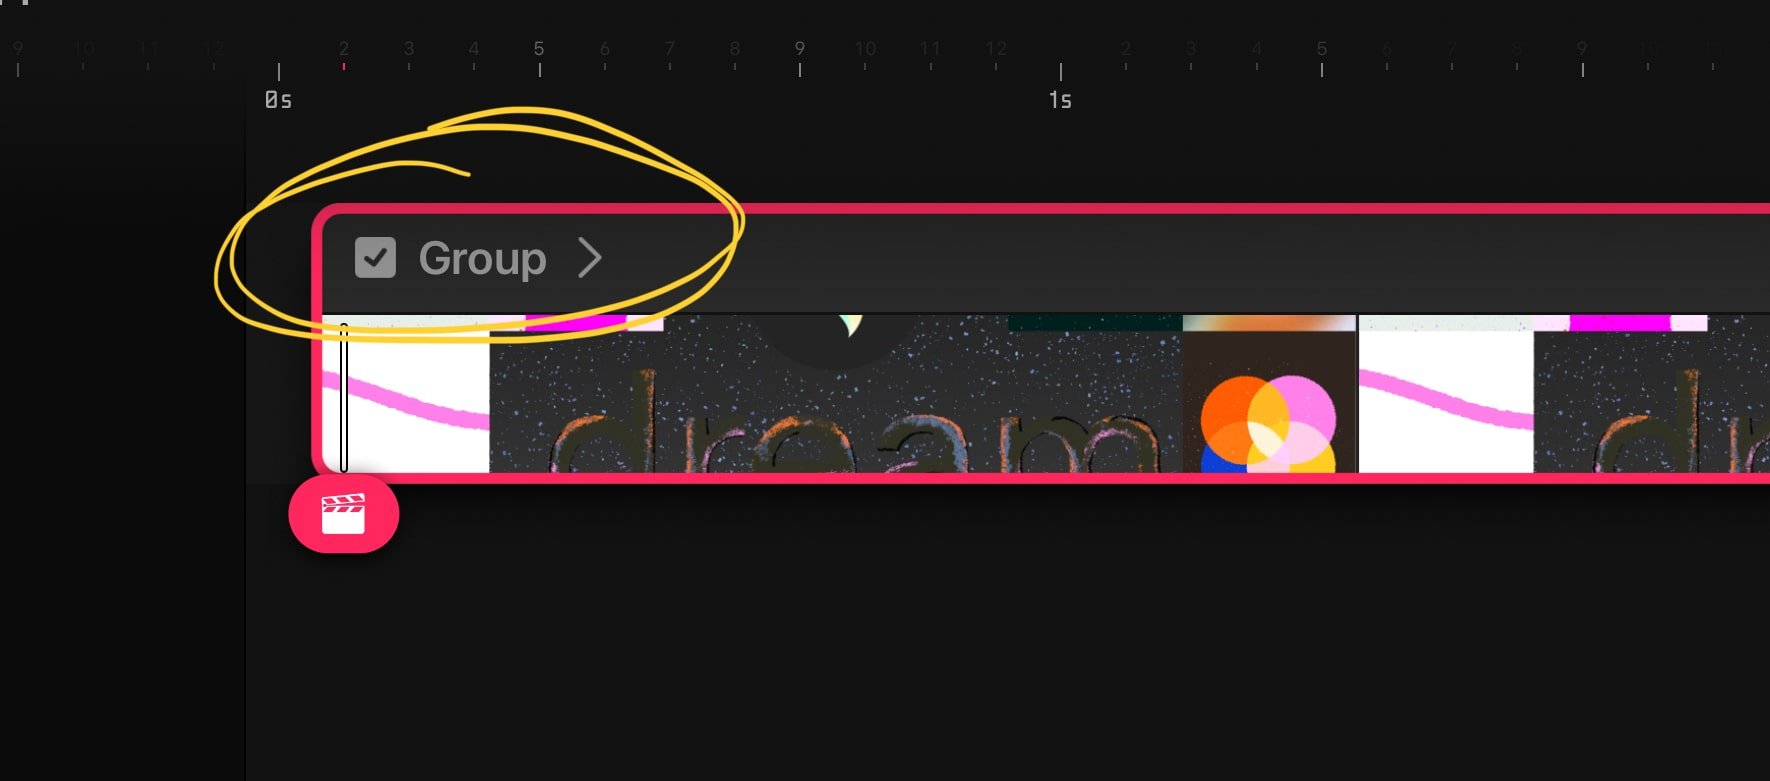
Convert Layers to Tracks: Once you press Convert Layers to Tracks, your imported track will turn into a group, like shown below
You can expand the group by tapping on the right arrow “>“ to expand the group, and that’s where you see your lovely layers of the layered Procreate file.
Got more questions?
Check out the 40+ Procreate Dreams FAQ Youtube Playlist
Conclusion: Animating your Procreate artwork in Procreate Dreams is an excellent way to bring your digital illustrations to life. By following these steps, you can seamlessly import your layered Procreate files into Procreate Dreams and start creating stunning animations. Remember, practice and experimentation are key to mastering animation, so don't be afraid to try new techniques and approaches.
Happy Animating!
About Esther Nariyoshi
Hi, I am an illustrator and digital brush creator who loves exploring all mediums. I've had the joy of collaborating with some wonderful folks, like Cloud9 Fabrics, and MSU Broad Art Museum, and sharing some tidbits of my creative process through UPPERCASE Magazine. My heart finds joy in food and nature illustrations, and I share my creative process on my YouTube Channel and teach well-designed illustration classes on Skillshare.
Portfolio | Instagram | Pinterest | Digital Brushes | 1:1 Coaching Calls
Skip hours of sifting through generalized tutorials, and enjoy a personalized learning session with a laser focus. In a 1-on-1 session, you will receive personalized instruction on how to elevate your digital illustration to the next level based on your own artistic style and preference using Procreate, Adobe Illustrator, and Photoshop, as well as your paper sketchbook.
Related Posts
Procreate vs Photoshop 2024: A Comprehensive Comparison for Digital Artists
Essential Guide to Alpha Lock, Layer Masks, and Clipping Masks in Adobe Photoshop
10 Reasons Artists Should Be Excited About the Launch of Procreate Dreams
How to Create and Apply a Displacement Map in Adobe Photoshop
100 Essential Photoshop Shortcuts for Mac Users


